Last Updated: January 08 2026
How to Manage Assets
Overview
Using the Assets feature in Simpro Mobile, technicians can test assets and record the test results while completing a quote / job in the Service module. Technicians can scan asset barcodes and QR codes in Simpro Mobile saving the search time when testing assets. Technicians can view test history for each asset, including the test results, readings, failure points, recommendations, and notes, and also reuse these details for the current asset when testing for the same service level.
Learn more in How to Use Barcodes in Simpro Premium.
 Required setup
Before performing the steps detailed below, ensure that this part of your build is set up correctly. The relevant steps to set up the features and workflows detailed in this article can be found here:
In order to view content or perform actions referred to in this article you need to have the appropriate permissions enabled in your security group. Go to System![]() > Setup > Security Groups and access your security group to update your permissions. The relevant security group tab and specific permissions for this article can be found here:
> Setup > Security Groups and access your security group to update your permissions. The relevant security group tab and specific permissions for this article can be found here:
Security access
You can view and access assets on a quote / job in the Service module only if you have the relevant security group.
Basic requirements to access the Assets feature in Simpro Mobile:
- Simpro Premium URL and login credentials
- Valid mobility licence. Learn more in Adjust employee settings.
- In Simpro Premium, go to People
 > Employee / Contractor, open the relevant card, select the Mobility > Mobile check boxes under Profile > Settings > Licences and select the relevant Mobile Security Group with the Service Module and Assets tab enabled.
 - Latest version of Simpro Mobile app.
Learn more in Simpro Mobile.
Technicians can complete asset testing in the field once:
- The quote / job is created either manually or with Maintenance Planner, and the relevant assets are added to the quote / job.
- The technician is scheduled, or the quote / job has reached its due date and the relevant employee is made the assigned Technician.
If you have an Asset enabled for a user in their employee card, the section displaying PASSED, FAILED and UNTESTED assets only appears if assets are added to the quote / job.
Create new assets
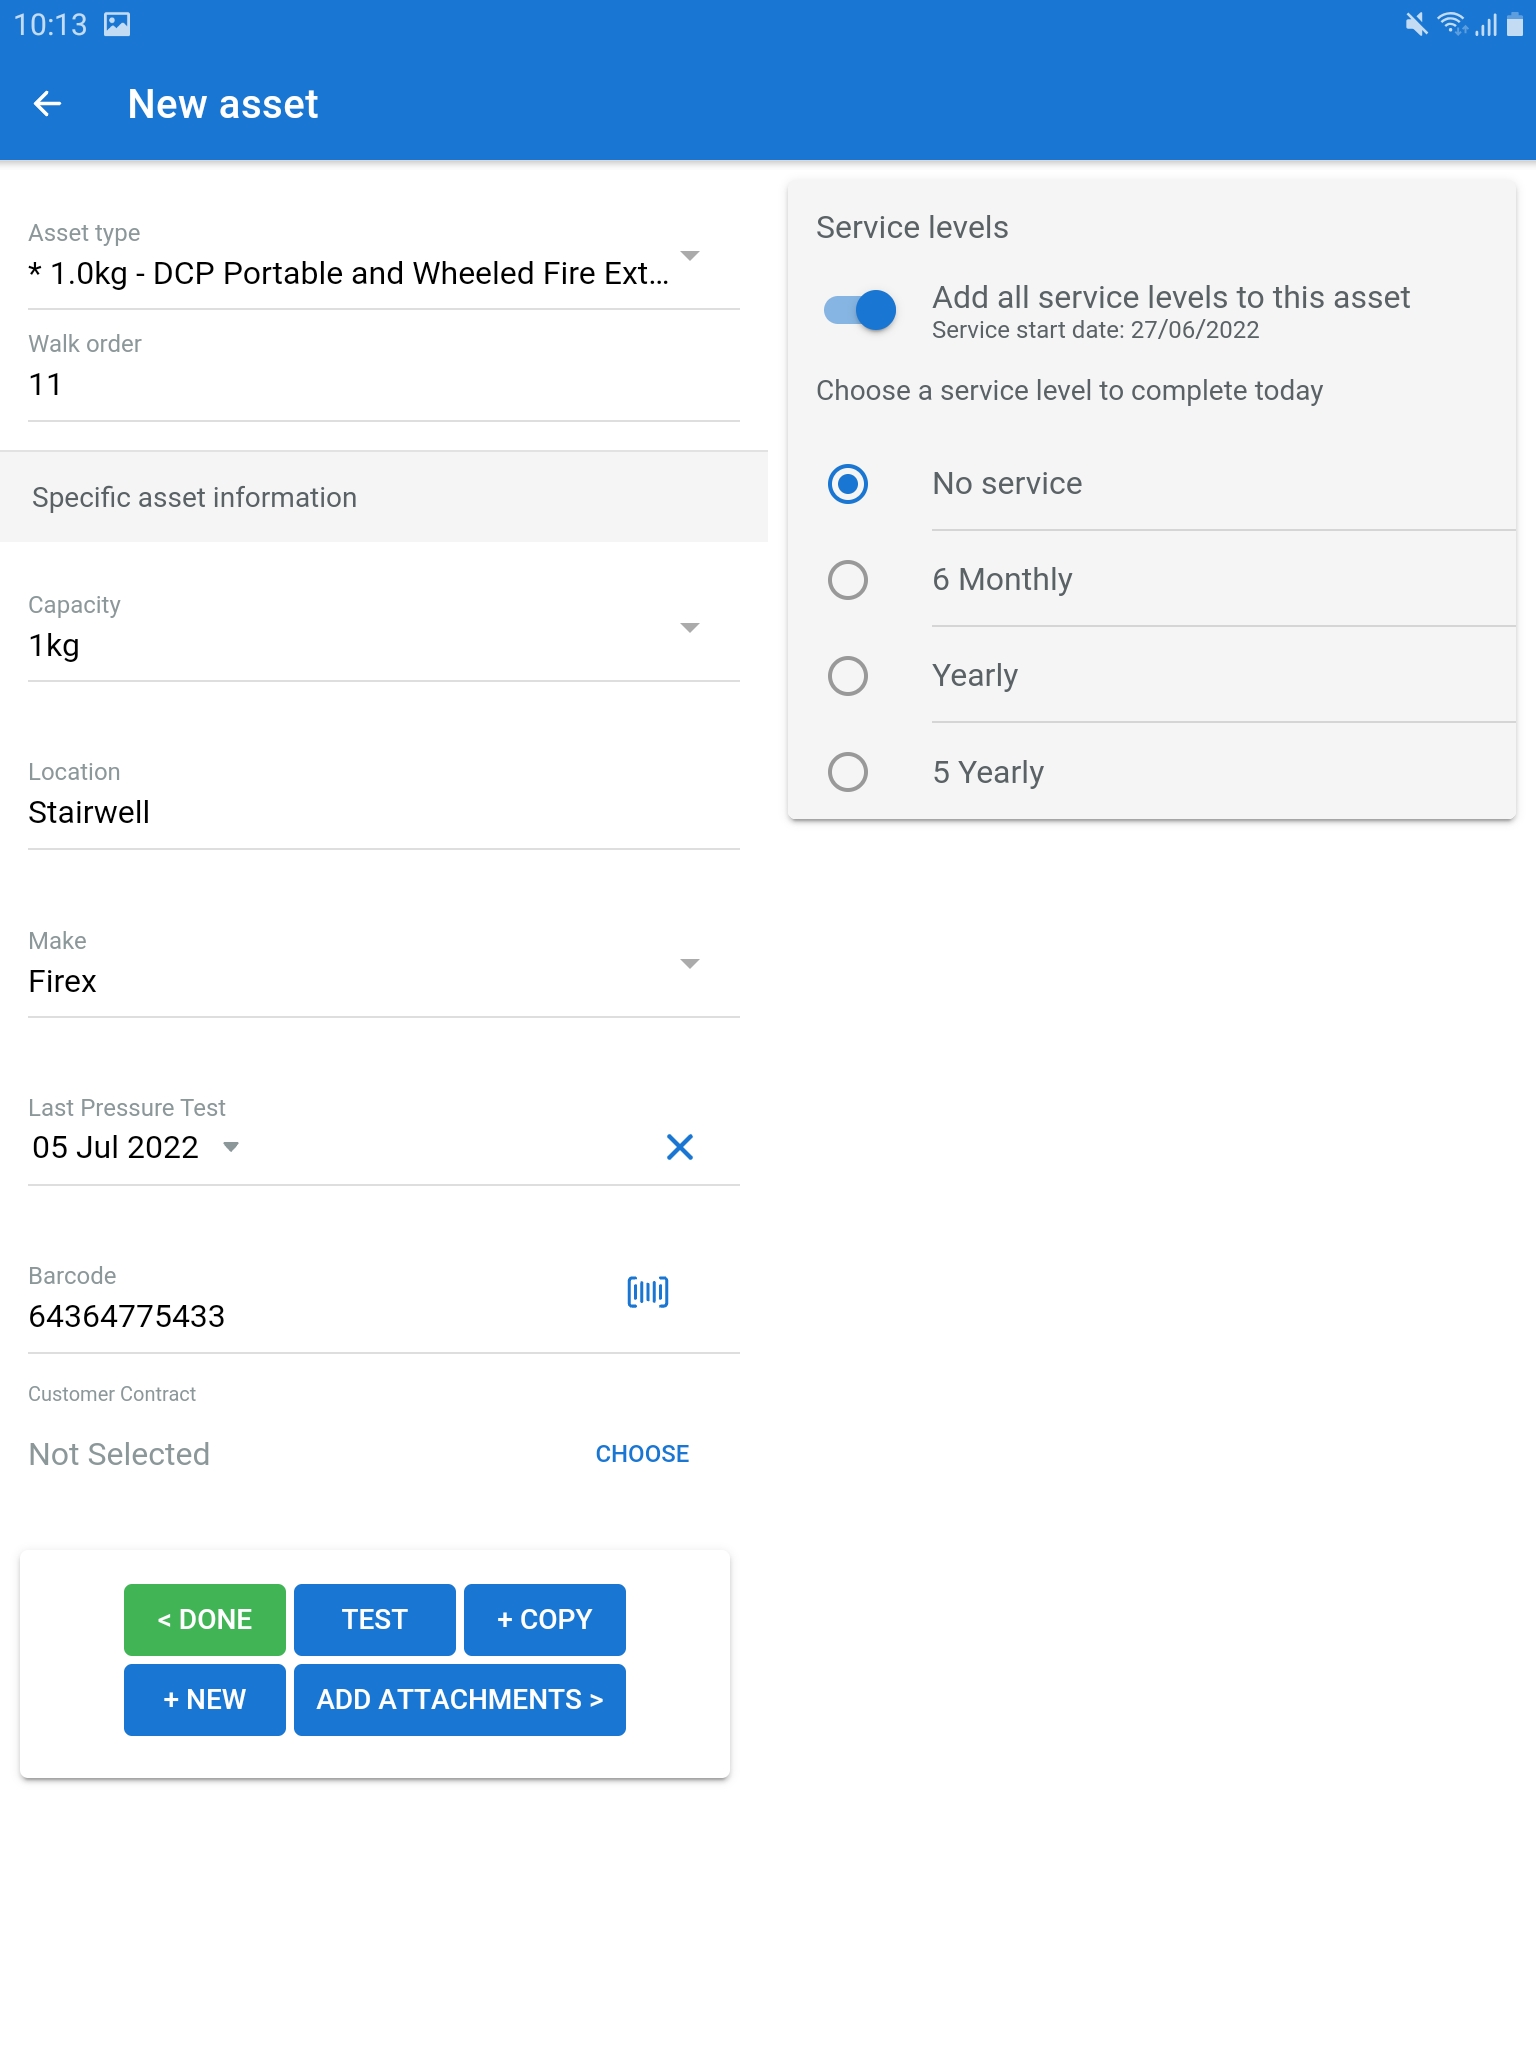
To create a new asset in the job:
- Tap + NEW ASSET on the Assets page.
- Select a relevant Asset type and the Walk order number.
- Enter Specific asset information in the custom fields, as required.
- Tap the
 icon to scan a new barcode or QR code for the asset.
 -
 Toggle on and add Service levels to the asset.
- Select an individual service level to use when testing the asset for the current day.
- The service levels available for selection are pulled from the service levels assigned to the asset type in Simpro Premium.
- Alternatively, select No service if you do not need to service it on the current day.
- Tap ATTACHMENTS to add an image of the assets as required.
- When you finish creating the asset:
- Tap TEST to record the asset test results for the current day.
- Tap COPY to save the current asset and create a new asset using the same details.
- Tap NEW to save the current asset and create a completely new asset.
- Tap DONE to return to the list of assets.
View and access assets
When you open a quote / job in the Service module, the total number of assets in the cost centre are displayed along with a breakdown of the total number of Untested, Passed and Failed assets.
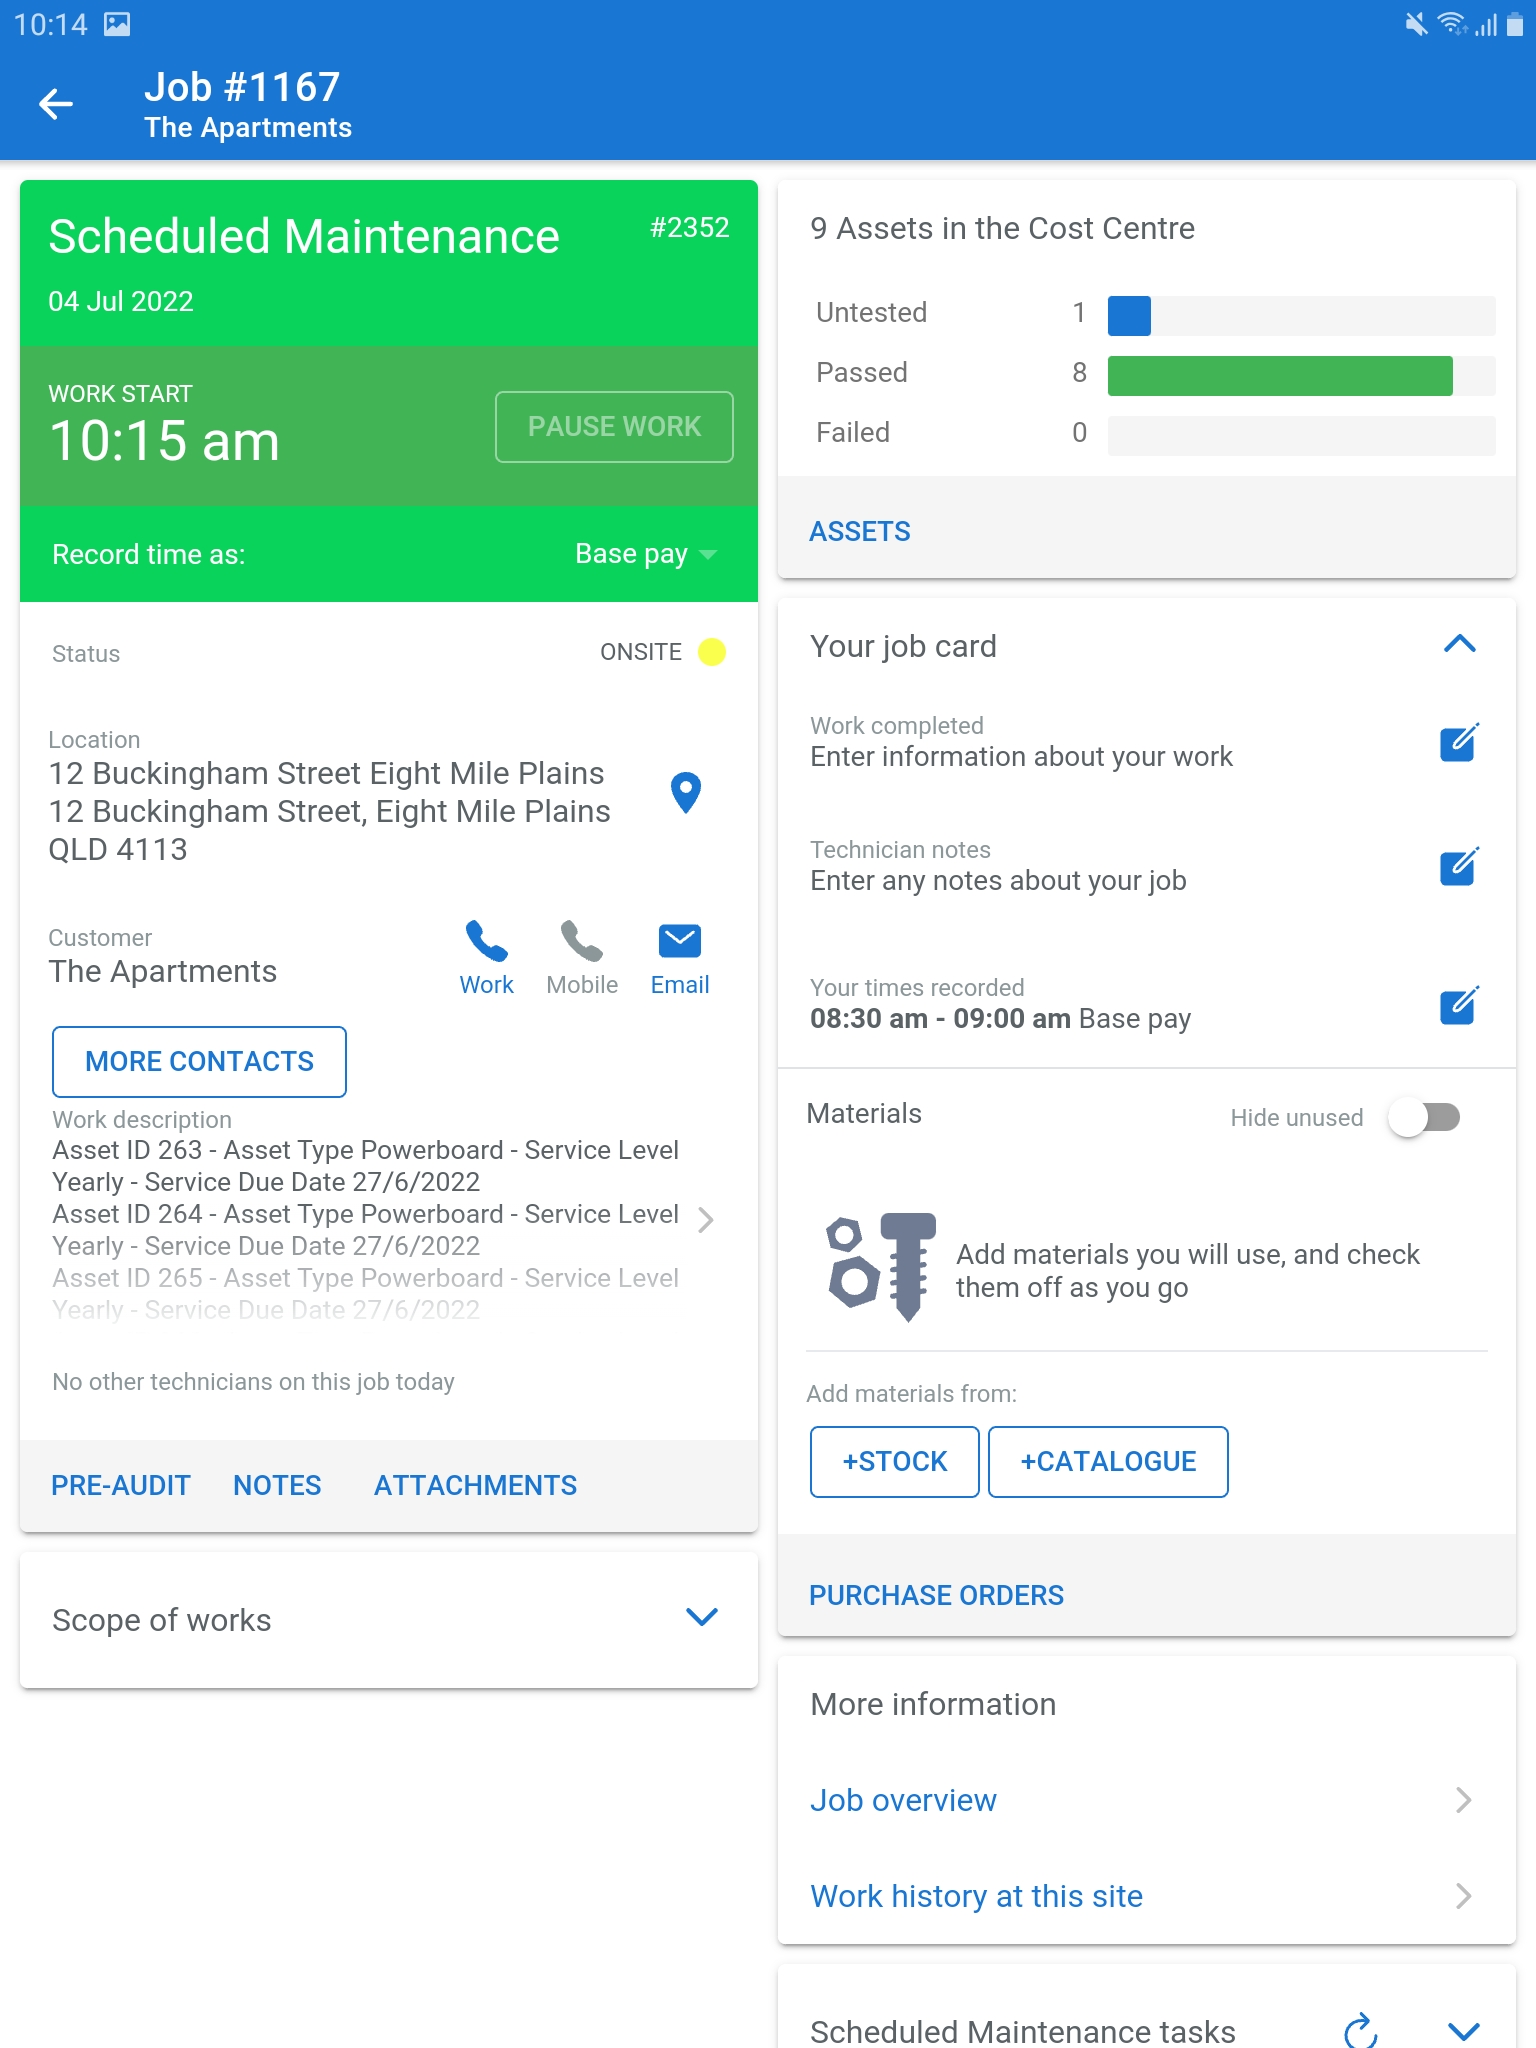
If the quote / job has multiple cost centres, tap Quote / Job Overview to display the number of asset across all cost centres.
To begin working on an asset maintenance quote / job in Simpro Mobile, follow the initial instructions in Manage scheduled jobs until you tap START WORK, complete pre-audits, view notes, manage attachments, and understand the scope of works.
You can view the list of assets on a quote / job without tapping START WORK or completing any required PRE-AUDITS. However, to record new test results or add additional assets, you need to tap START WORK and complete the mandatory PRE-AUDITS.
Tap ASSETS to view the assets added to the cost centre. The Assets page displays a list of assets with different navigation and filter options. You can start testing individual assets, choose to pass all untested assets and also create new assets.
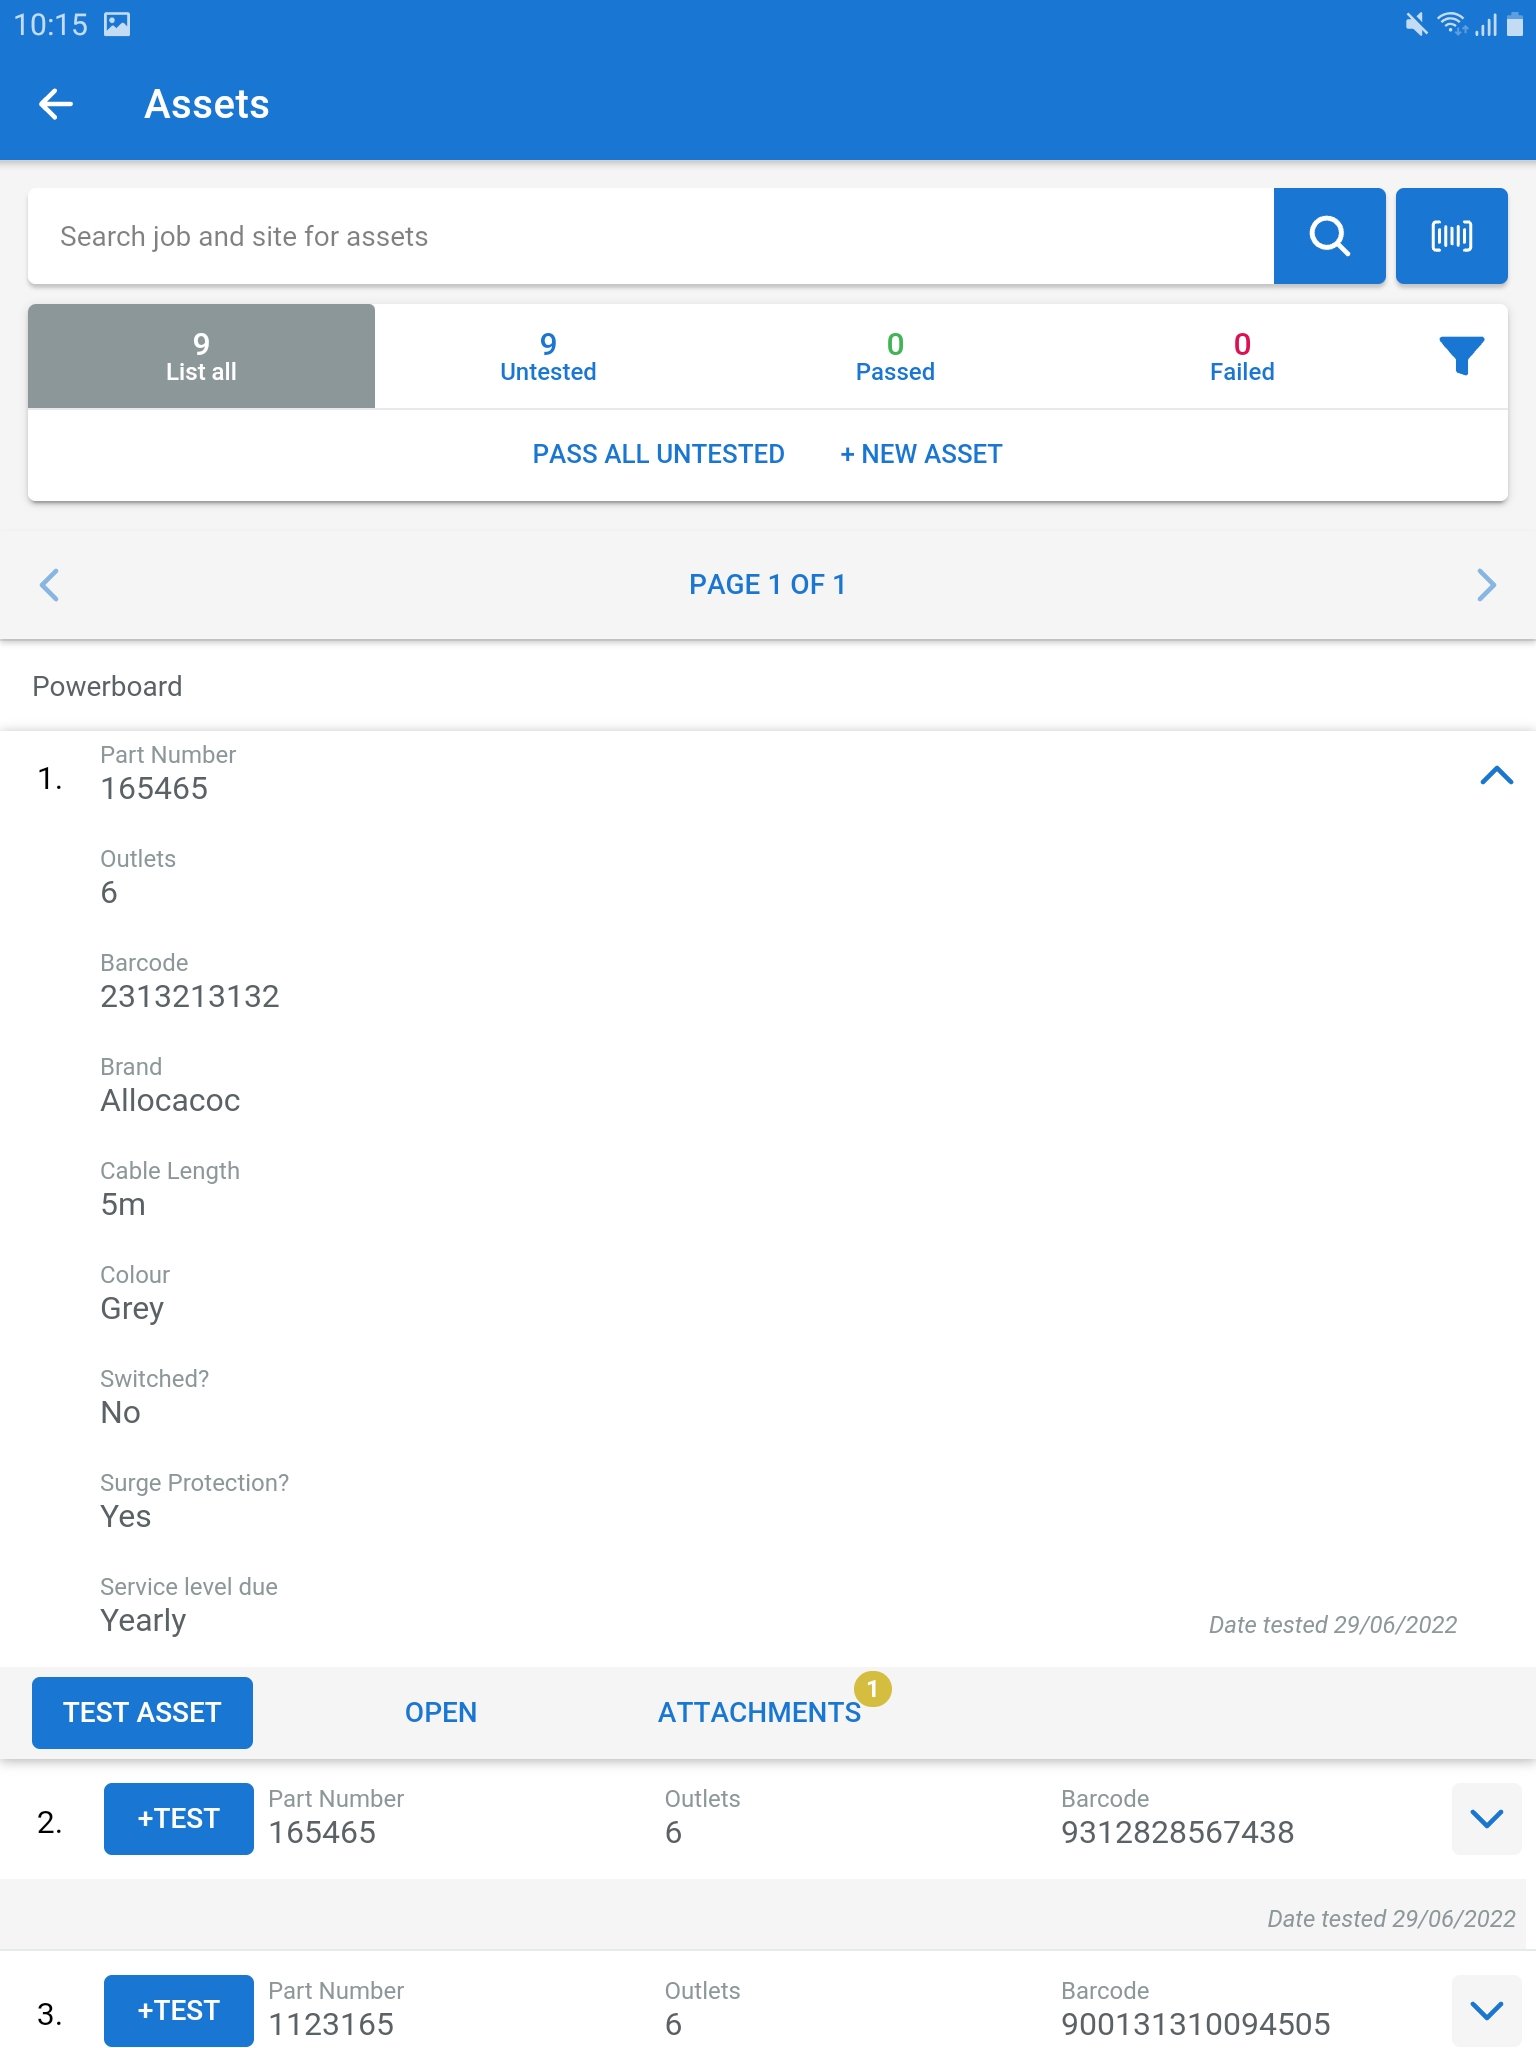
Following navigation options are available on the Assets page:
- Use the search bar to manually enter asset ids / custom fields to locate an asset from the list.
- Use the icon to search for an asset using the barcode / QR scanner.
- You must have a barcode / QR code saved against the relevant asset in Simpro Premium. Learn more in How to Use Barcodes in Simpro Premium.
- You can search for any asset added to the site, quote / job or cost centre using the search bar or scanner.
- If you search for an asset that is on the site but is not added to the quote / job, tap ADD and start testing it, if required.
- Choose to List All assets, or only the Untested, Passed, or Failed assets, as required.
- Tap the
 icon and toggle on to List by asset type or walk order and use the drop-down to filter the list based on the available asset types.
 - Tap SITE to view all assets on the site.
- Tap the refresh icon to get the latest asset information. You can only refresh asset information if you are online.
- Tap ATTACHMENTS to view and add attachments.
Edit asset details
Tap the icon to expand an asset and view details including the custom fields and service levels ![]() .
.
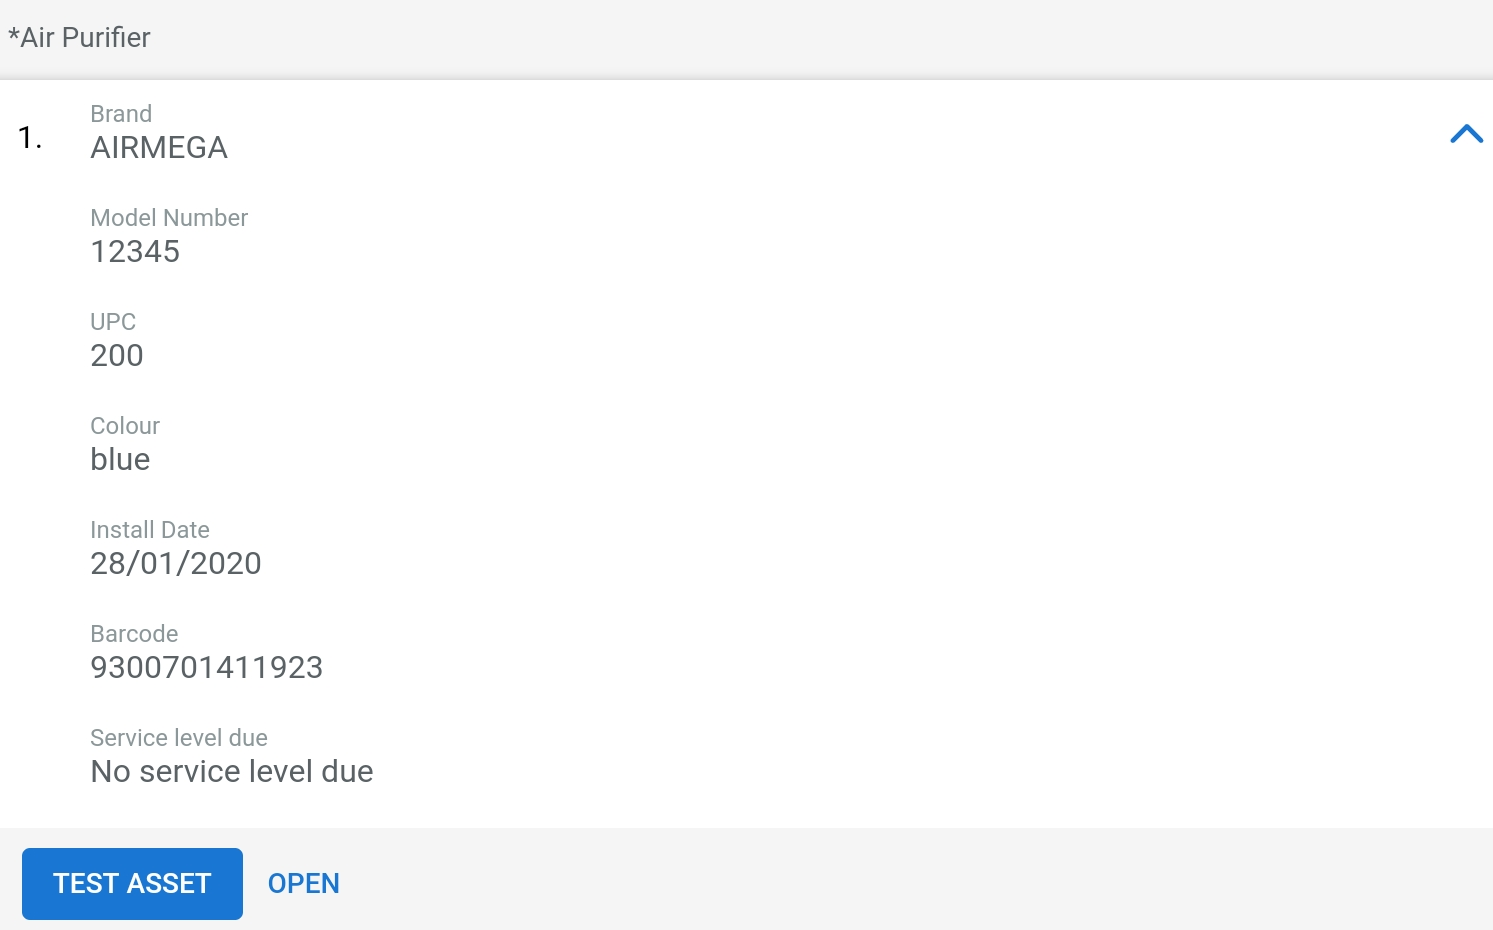
To update an asset's details:
- Tap OPEN in the expanded details view.
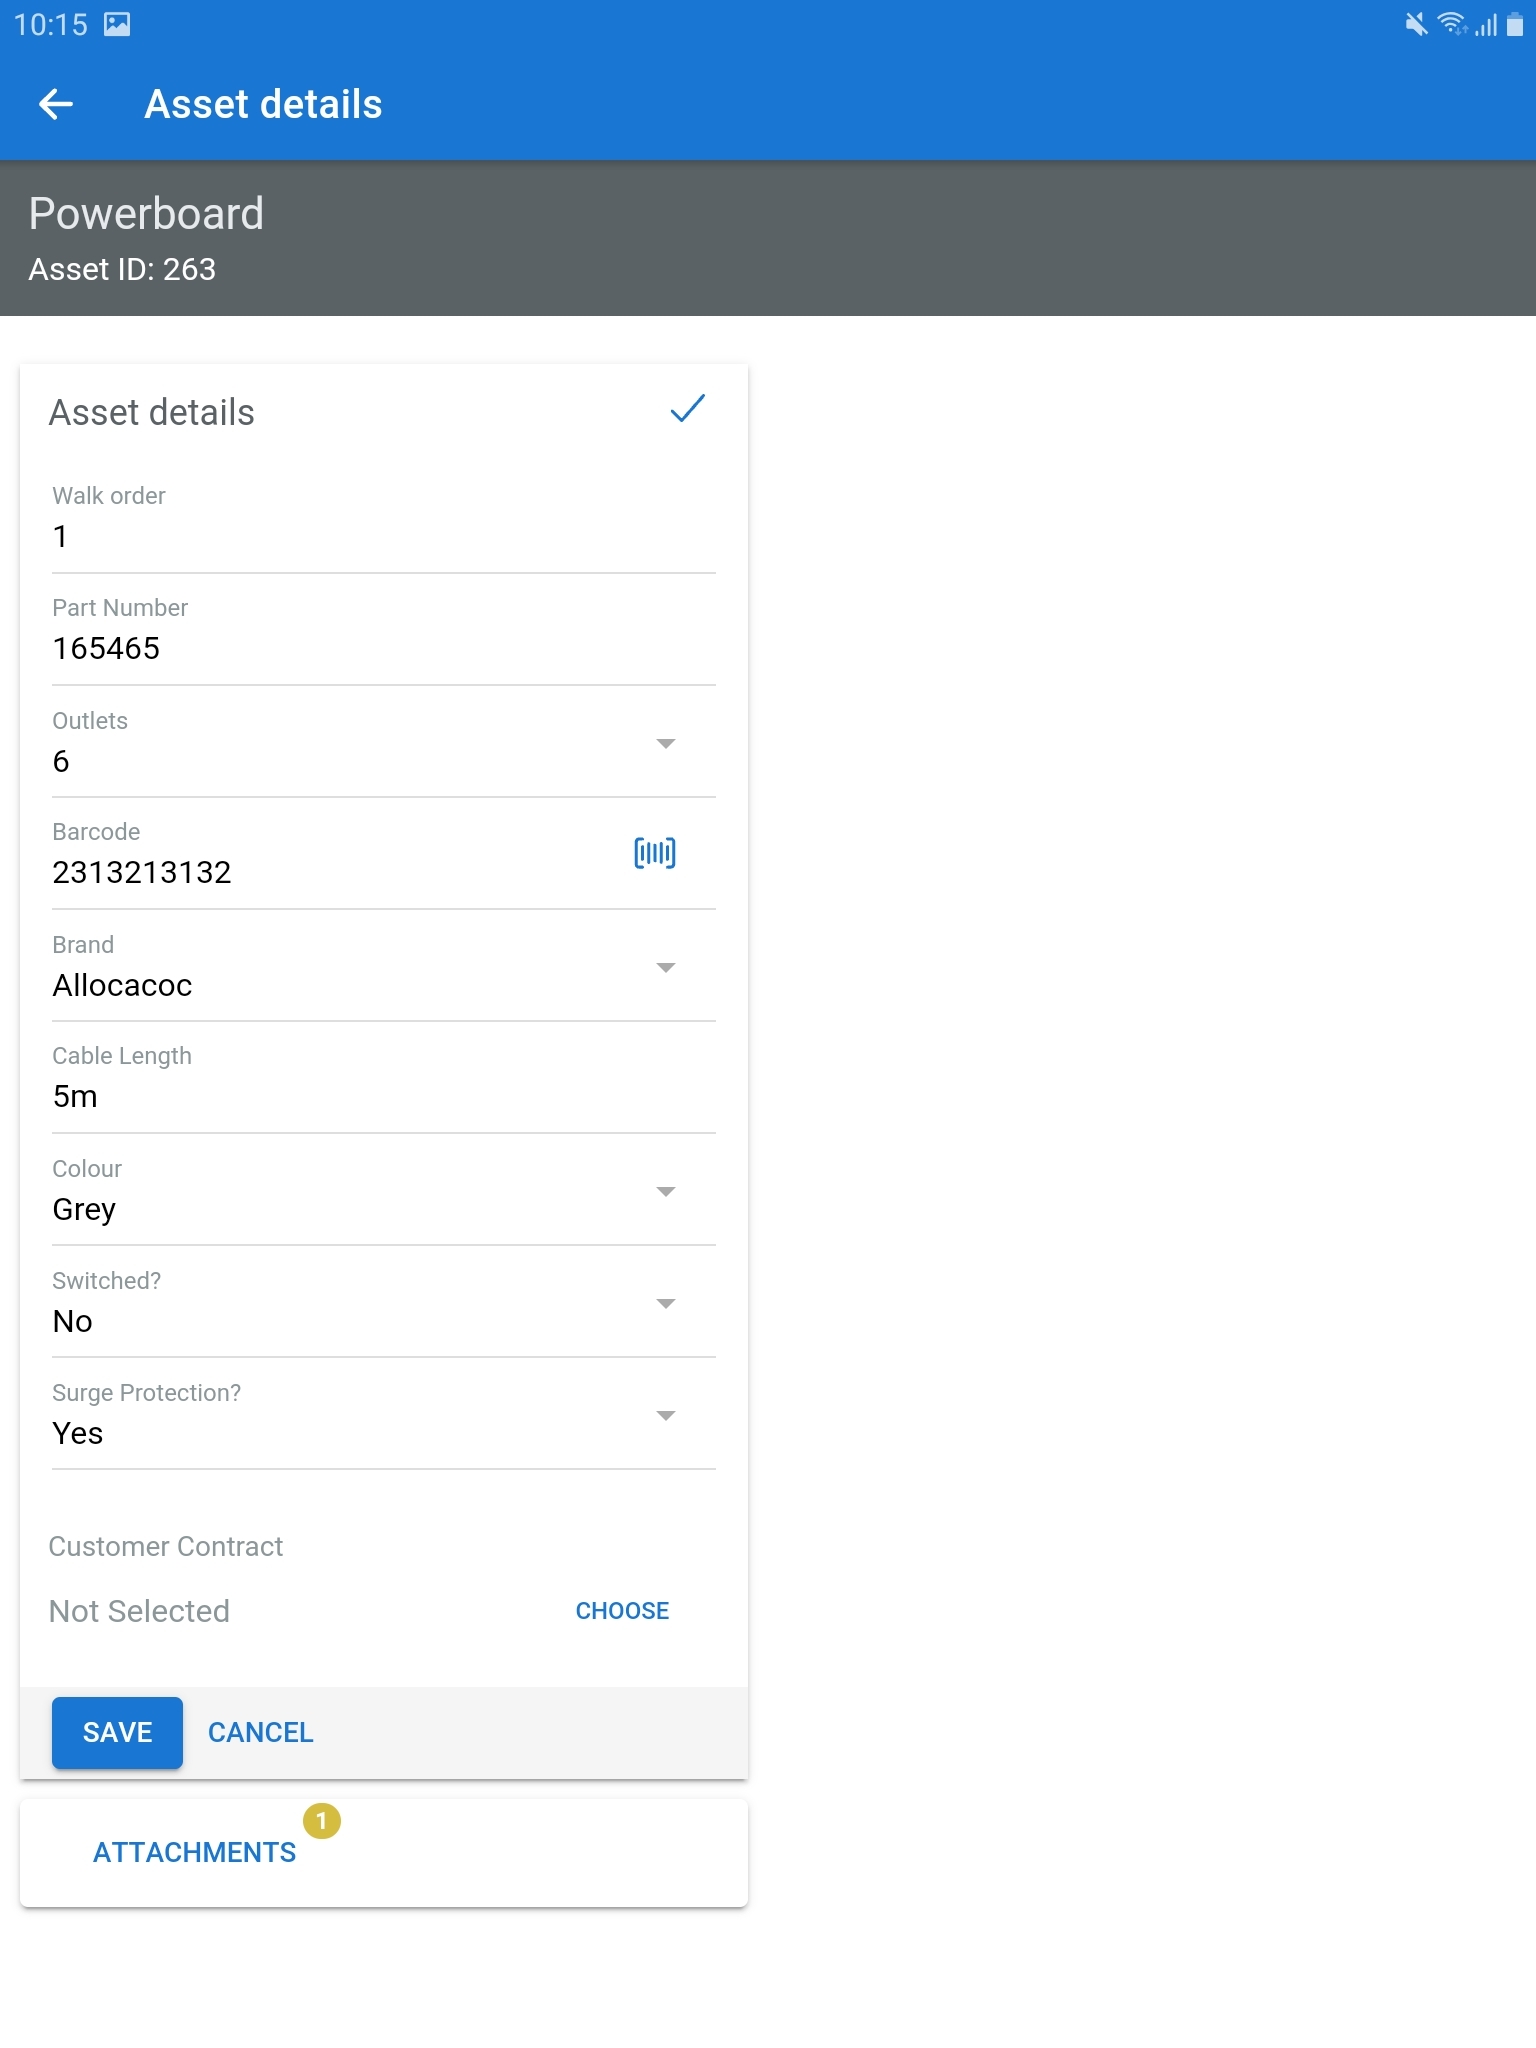
- View the Asset details and tap the edit icon.
- To apply a customer contract, select the customer contract from the drop-down list.
- Update the asset details, as required.
- Tap the icon to scan and record a new barcode for the asset.
- Tap ATTACHMENTS to add an image of the assets as required.
- Tap the
- Tap SAVE to update the asset.

Learn more about recording test results and creating new assets in How to Test Assets.
Learn more in the Learning Toolbox
For additional training, complete an interactive material in the Simpro's Learning Toolbox. Learn more in About Simpro's Learning Toolbox.